はじめに
この記事は、SLP KBIT Advent Calendar 2021の10日目の記事です。
他の部員の記事は以下からご覧ください!
adventar.org
今回は、VRでの動きのログをとって、眺めることができたら面白そうだな~~と思ったので、それをやっていきます。
GitHubのURLは → Amakuchisan/WalkingHistory です。
簡単に見ていくために、今回は下のような空間を用意しました。
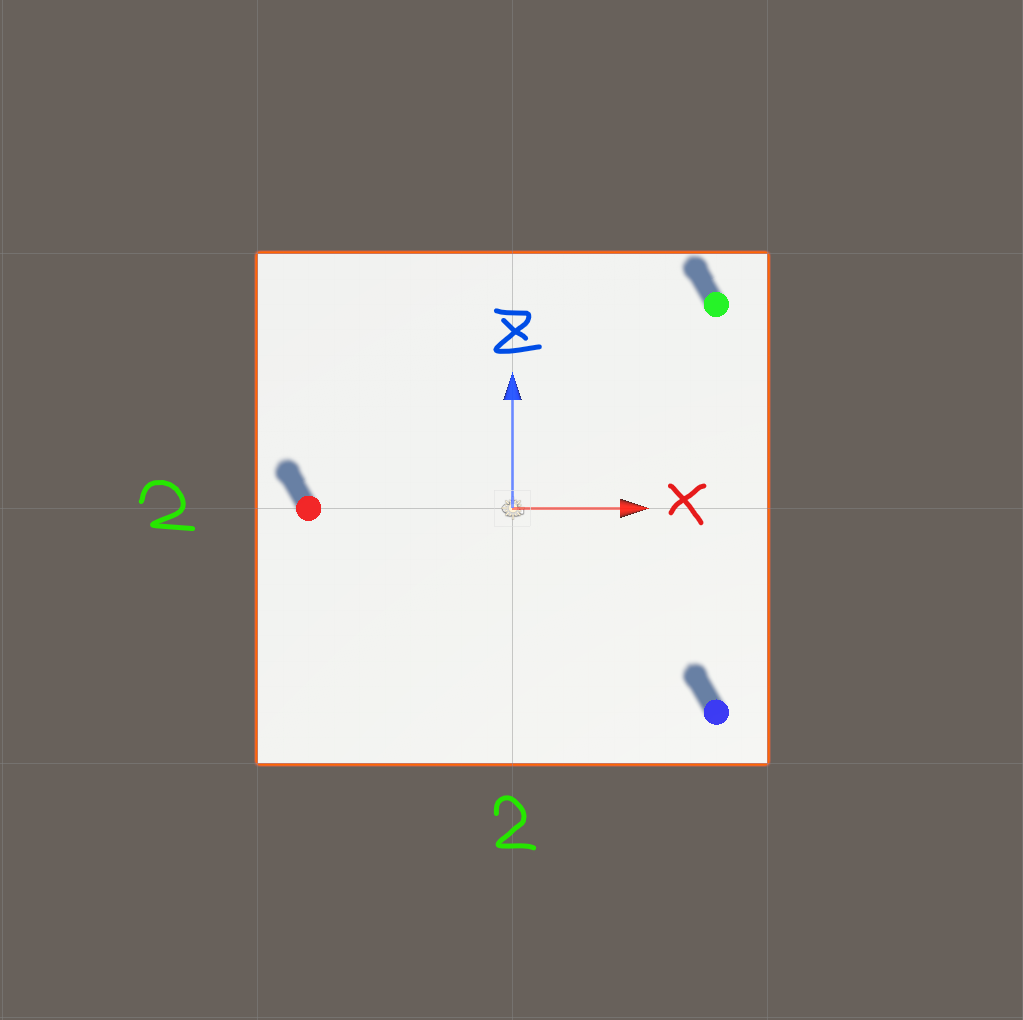
ヘッドセットはOculus Quest2を使い、プレイヤーの移動などは、Oculus Integrationのアセットを使用しています。
また、Quest2を使っていますが、今回はOculus Linkを使って、PCアプリケーションとして作成しています。
VR空間での移動を実装することはとても簡単で、Oculus Integrationのアセットからコピー&ペーストするだけで実装できます。
Assets/Oculus/VR/PrefabsのOVRPlayerControllerをシーンに配置し、Assets/Oculus/SampleFramework/Usage/にあるCustom Handsのシーンから、設定済みのCustomHandLeft、CustomHandRightの二つを拝借し、それぞれをOVRPlayerControllerのLeftおよびRightHandAnchorに貼り付けるだけです。
初期設定などは、よくこちらを参考にしています。
ファイルの生成
ファイルの生成場所
ファイルの保存場所には、実行中の一時的なデータの保存場所や、永続的なデータの保存場所など、いくつか存在します。
今回取りたいログは、永続的に保存したいので、Application-persistentDataPath - Unity スクリプトリファレンスを使います。
Application.persistentDataPathは、永続的なデータディレクトリのパスを返します。
例えば、私のWindowsの環境の場合は、 C:\Users\{ユーザ名}\AppData\LocalLow\DefaultCompany\プロジェクト名 を指します。
データの取得
今回は、2秒に1回のペースで現在の時間、位置情報と正面の向きを取得するようにしました。
(正面の向きについては、一応取得はしましたが、今回ほとんど役立っていません。今後機能が拡張されたときに使われる予定です)
public class Walking
{
    public DateTime time;
    public Vector3 position;
    public Vector3 forward;
    public Walking(DateTime time, Vector3 position, Vector3 forward)
    {
        this.time = time;
        this.position = position;
        this.forward = forward;
    }
}
Aボタンを押したときに、データをファイルに保存するようにしました。
コントローラのマッピングは、下記を参考にしています。
Map Controllers | Oculus Developers
using System;
using System.Collections;
using System.Collections.Generic;
using UnityEngine;

public class WalkingHistory : MonoBehaviour
{
    [SerializeField]
    private GameObject player;
    [SerializeField]
    private GameObject LogObj;
    private Log Log;
    private List<Walking> walkings = new List<Walking>();
    // Start is called before the first frame update
    void Start()
    {
        Log = LogObj.GetComponent<Log>();
        // ログの記録
        StartCoroutine(nameof(AddWalkingHistory));
    }

    void Update()
    {
        // Aボタンが押されたら、ログを保存する
        if (OVRInput.Get(OVRInput.Button.One))
        {
            // ファイル名は、適当にsampleuser_20211210080000.csvみたいな感じにしてみた
            var fileName = "sampleuser_" + DateTime.Now.ToString("yyyyMMddHHmmss") + ".csv";
            Save(fileName, walkings);
        }
    }

    private void Save(string fileName, List<Walking> history)
    {
        // 後ほど作成。ファイル名と文字列のリストを渡してファイルを保存する。
        Log.Output(fileName, WalkingListToCSV(history));
    }
AddWalkingHistory関数を使って、ログをリストに追加していきます。
2秒に1回ログを追加するために、コルーチンを使っています。
    private IEnumerator AddWalkingHistory()
    {
        WaitForSeconds cachedWait = new WaitForSeconds(2f);
        while (true)
        {
            walkings.Add(new Walking(
                DateTime.Now,
                player.transform.position,
                player.transform.Find("OVRCameraRig/TrackingSpace/CenterEyeAnchor").transform.forward
            ));
            // 2秒待つ
            yield return cachedWait;
        }
    }
WalkingのリストをCSVのリストに変換する関数はこんな感じです。
position.ToString()みたいな感じにしようかと思っていたんですが、その場合
(position.x, position.y, position.z)という形で出力されるので、カッコの扱いに悩んで却下しました。
    private List<string> WalkingListToCSV(List<Walking> history) {
        List<string> str = new List<string>() {"time,position.x,position.y,position.z,forward.x,forward.y,forward.z"};
        for (int i = 0; i < history.Count; i++)
        {
            str.Add(string.Join(",", new List<string>(){
                history[i].time.ToString(),
                history[i].position.x.ToString(),
                history[i].position.y.ToString(),
                history[i].position.z.ToString(),
                history[i].forward.x.ToString(),
                history[i].forward.y.ToString(),
                history[i].forward.z.ToString()
            }));
        }
        return str;
    }
}
ファイルの保存
実際にファイルを保存する、Logクラスです。
はじめに、CreateDirectory関数を使って、Logディレクトリがなかった場合は作成するようにしています。
using System.Collections.Generic;
using UnityEngine;
using System.IO;

public class Log : MonoBehaviour
{
    private static string filePath = string.Empty;

    void Start()
    {
        CreateDirectory();
    }

    // ログ保存用のディレクトリを作成
    private void CreateDirectory()
    {
        filePath = Application.persistentDataPath + "/Log/";

        if (!Directory.Exists(filePath))
        {
            Directory.CreateDirectory(filePath);
        }
    }

    // ログファイルの保存
    public static void Output(string fileName, List<string> logs)
    {
        var FullPath = Path.Combine(filePath, fileName);
        File.WriteAllLines(FullPath, logs);
    }
}
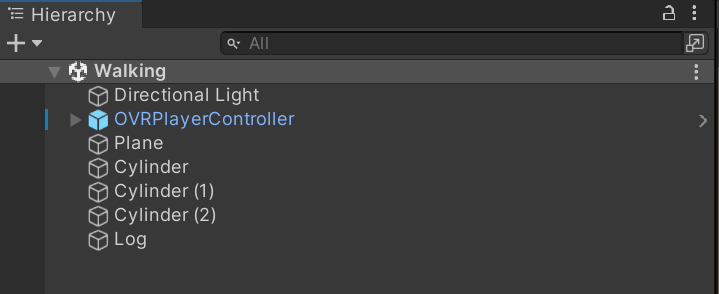
WalkingHisotry.csは、OVRPlayerControllerにアタッチして、Log.csはLogにアタッチしています。
Planeは床で、Cylinderは立っている三つの円柱のことです。
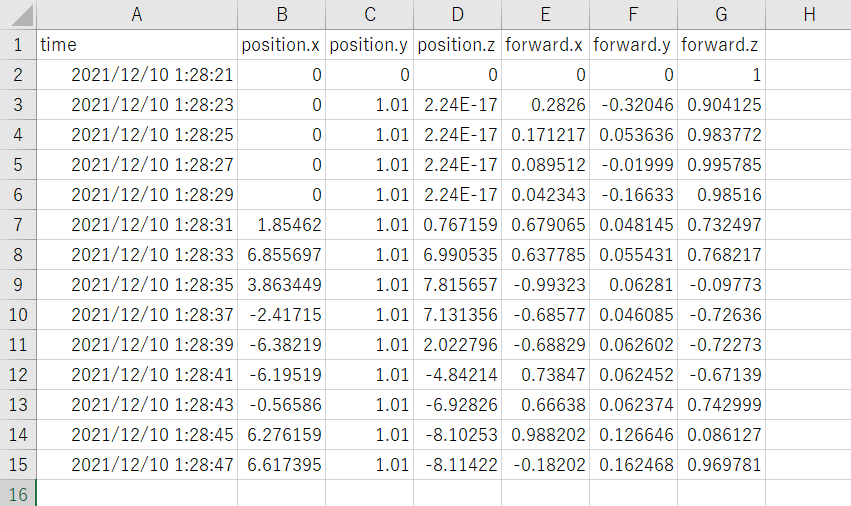
取得したログ
ログはこんな感じで取れました。
生成したCSVファイルのデータを利用する
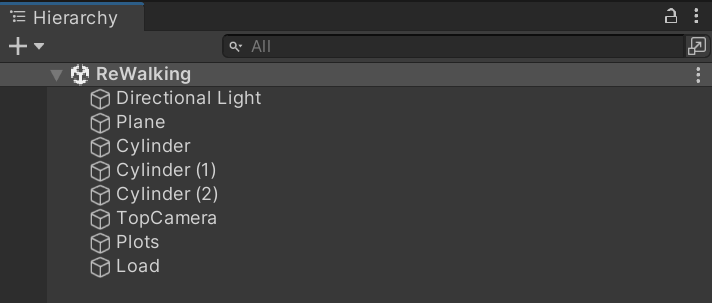
先ほどのシーンを複製し、取得したデータを利用するシーンを作成しました。
LoadとPlotsという空のGameObjectを作成し、それぞれにこれから作成するLoad.cs、PlotHistory.csをアタッチします。
また、軌跡を見る際はVRを使わないので、OVRPlayerControllerは削除し、TopCameraという、真上からのカメラを用意しました。
CSVファイルの読み込み
Load関数を作成しました。
ファイル名を良い感じに過去のデータ一覧から選択できるようにする手間を惜しんだので、
ファイル名は固定で、data.csvのファイルのみ読み込むコードになっています。
File.ReadAllLinesでCSVファイルをすべて読み込むと、1行ずつ文字列の配列dataに格納されます。
1行を、さらに ' , ' で区切ることで、time、position、forwardを取得することができます。
Convert.ToSingleは、文字列をfloatに変換するために使用しています。
using System.Collections.Generic;
using UnityEngine;
using System;
using System.IO;

public class Load : MonoBehaviour
{
    private List<Walking> walkings;

    void Start()
    {
        walkings = new List<Walking>();
        var filePath = Application.persistentDataPath + "/Log/data.csv";
        Read(filePath);
    }
    public void Read(string filePath)
    {
        if (File.Exists(filePath))
        {
            string[] data = File.ReadAllLines(filePath);
            for (int i = 1; i < data.Length; i++)
            {
                string[] d = data[i].Split(',');
                walkings.Add(new Walking(
                    DateTime.Parse(d[0]),
                    new Vector3(Convert.ToSingle(d[1]), Convert.ToSingle(d[2]), Convert.ToSingle(d[3])),
                    new Vector3(Convert.ToSingle(d[4]), Convert.ToSingle(d[5]), Convert.ToSingle(d[6]))
                ));
            }
        }
    }
}
立っていた場所にキューブを置いてみる
キューブを生成する関数、Plotを作成しました。
Inspectorで、キューブのオブジェクトと、何秒(seconds)に1個キューブを置くかを指定します。
CubeObj.transform.parent = transform; とすることで、Plotsの子オブジェクトとして、Cubeが生成されます。
public class PlotHistory : MonoBehaviour
{
    [SerializeField]
    private GameObject Cube;
    [SerializeField]
    private float seconds = 2.0f;

    // 2秒に1回生成する
    public IEnumerator Plot(List<Walking> walkings)
    {
        WaitForSeconds cachedWait = new WaitForSeconds(seconds);
        GameObject CubeObj;
        for (int i = 0; i < walkings.Count; i++)
        {
            CubeObj = Instantiate(Cube, walkings[i].position, Quaternion.Euler(walkings[i].forward));
            CubeObj.transform.parent = transform;
            // seconds 秒待つ
            yield return cachedWait;
        }
    }
この関数を、先程のLoad関数で、ファイルを読み込んだあと(if (File.Exists(filePath))の中の最後の行)で呼び出すようにします。
StartCoroutine(Plots.GetComponent<PlotHistory>().Plot(walkings));
これで、ログに記録した場所にキューブが生成されるようになりました。
線を引いてみる
最後に、キューブを置いた場所に線を引いてみます。
こちらの記事を参考にしました。
【Unity】今更ながらLineRendererで線を引く - 原カバンは鞄のお店ではありません。
RenderLine関数を作成しました。
    [SerializeField]
    private GameObject Line;

    private void RenderLine(List<Walking> walkings)
    {
        GameObject beam = Instantiate(Line, walkings[0].position, Quaternion.Euler(walkings[0].forward));
        LineRenderer line = beam.GetComponent<LineRenderer>();
        // 頂点数
        line.positionCount = walkings.Count;
        // 線を引く
        for (int i = 0; i < walkings.Count; i++)
        {
            line.SetPosition(i, walkings[i].position);
        }
    }
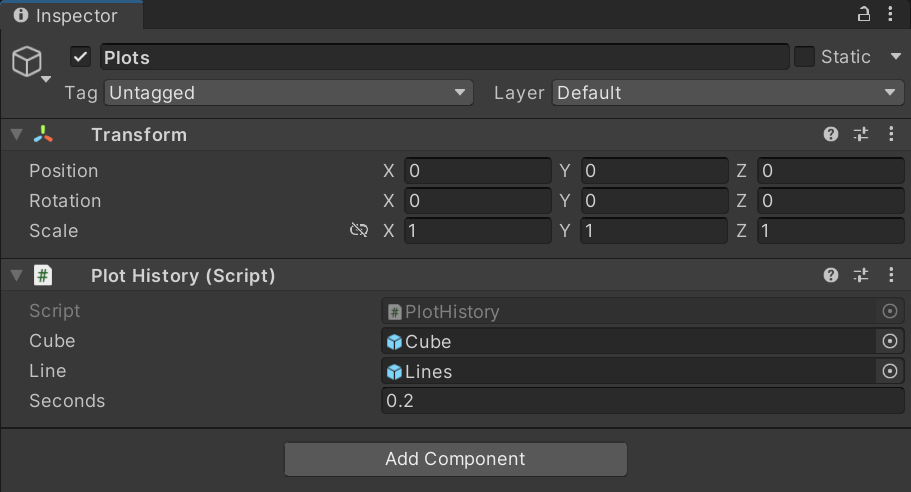
このとき、Inspectorはこんな感じです。
早めの、0.2秒に1個のキューブを生成するようにしています。
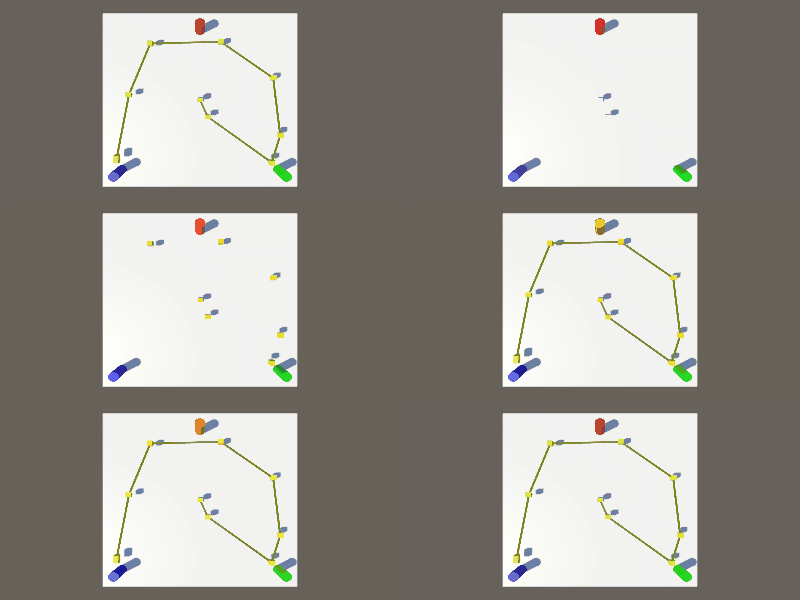
この関数を、Plot関数の最後に呼び出してやると、下のGIFのようになります。
おわりに
キューブとキューブの間隔が広かったら、急いで移動したんだなとか、
間隔が狭かったら、ゆっくりor立ち止まっていたんだなとか、
そういったことが見られて結構面白いと思いました。
本当は、複数の移動パターンを用意して、ログ同士の比較をして、「何%くらい同じような動きをした」とか出したかったんですが、今回はそこまでは行っていません。
今後、それは別件でやる予定があるので、気が向いたら続きとしてブログに記述したいですね。
(こういうと、結局何も書かずに数ヶ月たったりすることが多いですが、3ヶ月以内くらいに続きを書けたらいいなと思っています)